
“Creating means living”
– Dejan Stojanovic
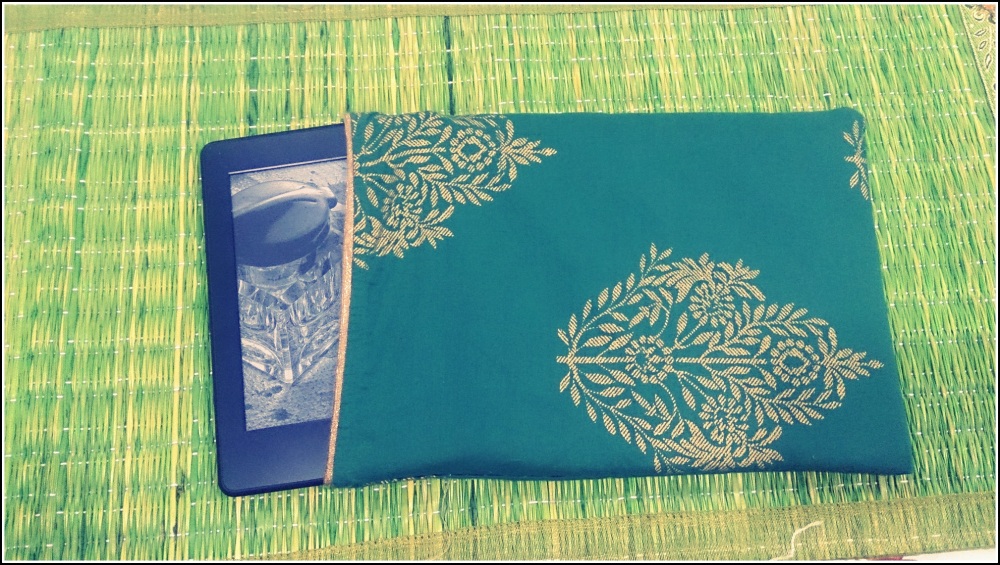
I’ve owned a Kindle for a long time and wanted to make a cover for it myself. I’ve been putting it off for the longest time. Until I made this a few weekends back.
Now, this is a slightly complicated DIY and one of my biggest projects till date. But it was totally worth it! I’m super glad it turned out perfectly – just the way I’d imagined it to 🙂
Things needed

Pieces of cloth (I used the sleeve from one of my mom’s kurtis)
Needle & thread
Foam sheet (one thick and one thinner)
Cardboard (optional)
Paper cutter/knife
Ribbon (to go with the cloth chosen)
One matching button
A pair of scissors
3 Hooks
Steps
- First, cut out a piece of cloth four times the size of your Kindle. Then stitch it out on three sides, leaving one of the shorter sides open to make a bag. For my Kindle Paperwhite 6″, I stitched a bag 8″x 10″.

- Your Kindle should very easily slide inside the bag sideways.
- Now, cut out the foam sheet in a rectangle such that it fits exactly inside the bag. I used a piece 7.5″ x 9.5″.


- Next, put your Kindle inside the bag (sideways, as shown above) and using a pen, mark out the exactly the screen size. measurements for Paperwhite : 1″ from the top, 0.75″ from the side, and 2″ from the bottom.

- Next, you use a paper cutter to cut out a flap smaller than the square you just made. I left 0.75″ edges on each of the four sides so I could fold them under.

- Now take some soft foam. And cut out 4 strips of 0.75″x to fix on the sides of the flaps. You can also use cardboard (it will be sturdier).
- Turn the cloth bag inside out and fix the strips on 4 sides as shown below.

- Let it dry.

- Now turn the bag around (right side out).
- We need to make a fastener. Fold and stitch a rectangular strip of the same or a contrast cloth. Attach it at the back of your Kindle cover.


- Make a triangle in the front with a button hole in it. Attach a matching button on the front of the cover.
Tip: Alternatively, you can do away with a button and tie a matching ribbon around your cover – to give it a more vintage look. Like those in old fashioned diaries


- Slide in the thicker foam sheet. And tie a matching ribbon around the spine of the cover.


- Stitch on the 3 hooks and make eyes for them along the open edge. So you can take out your Kindle when you want.

You can make a hole at the bottom to operate the On/Off button and for charging your Kindle.
- Now put in your Kindle. You are good to go.
The result


How do you like it?
Weekend WOW: In this series, I plan to share interesting stuff I do on my weekends.
Other posts from this series:
Paris and a new look
Being Artsy
Lessons from Goa
Quilling, compliments, and books!
Cook. Sleep. Read. Repeat.

Great DIY
LikeLiked by 1 person
Thanks @mylifeasishan 🙂
LikeLike
Looks really amazing.
LikeLiked by 1 person
Thanks @Aman! I was so happy with the final result too 🙂
LikeLiked by 1 person